
Historic has been my favorite format since its creation. The larger card pool means more brewing and deck-building options than you’ll find in Standard — which is part of what makes Historic so fun. However, if you’re like me and like to play the best decks, you’ll probably enjoy Historic, too!
For a while, Historic has revolved around three major decks: Sultai Midrange, Mono-Red Goblins, and Jund Sacrifice. But there’s so much more to Historic, and plenty of room for other strategies to succeed. On my recent ladder climb last season, I identified that a different version of Sacrifice decks might be the best way to approach Sultai and Goblins.
A day before the end of the Arena Ladder season, I decided to do something I’ve never done before: see how high I could climb into the Mythic Ranks. It was never something I have actively pursued or put too much stock in, but after having a high win rate with my new take on Rakdos Sacrifice, I had to see how far the deck could take me. I ended up reaching #7 at my highest point while streaming and collected a lot of data along the way.
I have no doubt in my mind that Rakdos Sacrifice has earned a spot at the top of the format due to its consistency, resiliency, and ability to control the game at any point. Let’s run through the ins and outs of Historic’s new “Best Deck.”
The Deck
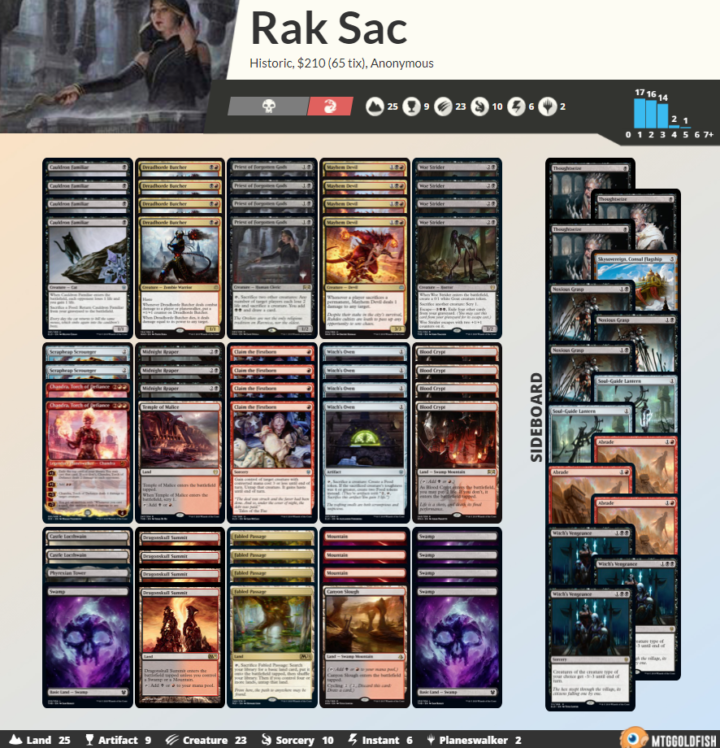
Jund Sacrifice has been the most popular Sacrifice deck in Historic for quite some time. You can build it in numerous ways, including cards like Collected Company, Bolas’s Citadel, Trail of Crumbs, or Korvold, Fae-Cursed King. But while there are a lot of ways to build Jund, I’ve found that cutting green from the deck entirely is the best way to attack the current metagame.
Card Choices
Jund Sacrifice decks aside, there have been numerous iterations on Rakdos in recent months, and there are still various ways to build the deck. With more Azorius Control in the format, I would favor a more aggressive build with Gutterbones and Dread Wanderer. With more combo in the format, a slower build of the deck with more Thoughtseize and interaction would be best.
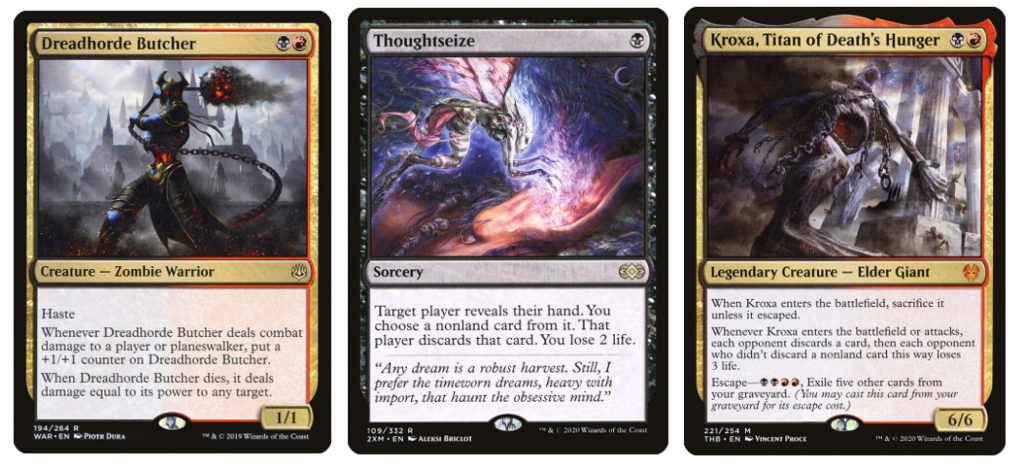
Because the format is predominantly split between Sacrifice, Sultai, and Goblins, it is essential for Sacrifice to be able to shift game plans based on what the opponent is playing. I don’t want a hyper-aggressive build right now, so leaving Gutterbones and Dread Wanderer at home is the best bet. Another way to build this deck is to cut Dreadhorde Butcher and other aggressive cards for Kroxa, Titan of Death’s Hunger and Stitcher’s Supplier. I’m not fond of this strategy right now outside of the Rakdos Arcanist deck; you end up committing to a grindier game with less explosive draws in the match-ups where you need to be more aggressive.
My current build of the deck exists in the happy middle ground between aggressive and grindy. The deck is capable of some fast starts, but it also has the ability to rebuild after an early board wipe. You can choose to slowly whittle down your opponent’s life total with Cauldron Familiar and Witch’s Oven, or you can go wide. The key is being able to read how the game is playing out and adjusting accordingly. This Rakdos Sacrifice build is able to pivot quickly, thanks to consistent numbers and versatile cards.
Gameplay
The gameplay of the sacrifice decks can be intimidating to someone new to the archetype. After hundreds of hours of gameplay, I still find some new tricks to the deck now and again. It might be daunting, but the best approach, in my experience, is to keep playing games until the play patterns come more naturally.
Before I touch on specific match-ups, I’ll go over some tips and tricks that might not be obvious your first time playing a sacrifice deck:
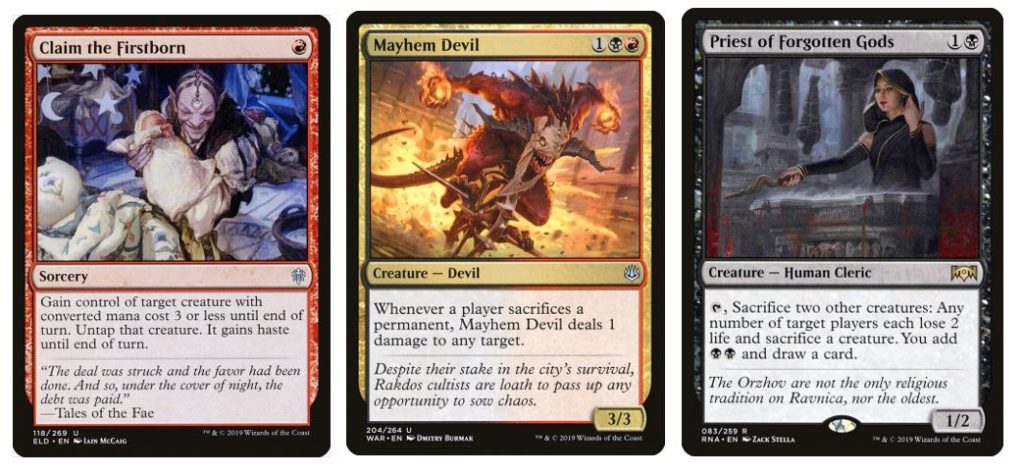
- You can target your own creatures with Claim the Firstborn. Most of the time, you’ll want to target Priest of Forgotten Gods so you can activate it the turn it comes into play. You can even activate a Priest that doesn’t have summoning sickness, then cast Claim the Firstborn to untap it and activate it again in the same turn.
- If you are not going to attack with Cauldron Familiar on your next turn, most of the time you will not want to bring it back from your graveyard on your opponent’s end step. This way, you get an extra point of damage if you play a Mayhem Devil on your next turn.
- Don’t activate Fabled Passage just to thin your deck. It’s often much better to use it for trigger Mayhem Devil for an extra point of damage.
- If you think your opponent has Cry the Carnarium, sacrifice your Cauldron Familiar on your own turn and return it to play on your opponent’s end step.
- Mayhem Devil and Priest of Forgotten Gods will often allow you to kill one or more creatures with Mayhem Devil triggers before Priest’s ability resolves. When you sacrifice two creatures, you will have two Mayhem Devil triggers on the stack, which will resolve before Priest‘s ability. You can target one or more creatures with Mayhem Devil’s ability to kill those creatures, sometimes leaving the opponent with only one option for a creature to sacrifice. (This works with Dreadhorde Butcher, too!)
- You can activate Scrapheap Scrounger at instant speed, which can help against countermagic or combine nicely with Priest of Forgotten Gods.
- If you have extra Food tokens in play, you can sacrifice Cauldron Familiar to Woe Strider and return Cauldron Familiar to the battlefield again for extra scrys.
- If you cast Claim the Firstborn targeting an opponent’s Priest of Forgotten Gods, you can also target yourself with its ability. This will allow you to sacrifice the Priest to its own ability, so your opponent never gets it back.
- Finally, here’s a tip I shared in a previous Sacrifice article: “In the mirror, there will be times when both players have a Mayhem Devil in play. If either player starts a chain of sacrifices, the Devils will target each other and both die in a blaze of glory. You want this to happen on your opponent’s turn, because the active player’s Mayhem Devil triggers will resolve last. That means there will be a short window while their Mayhem Devil is dead and yours has 2 damage on it, with the last of their Devil triggers on the stack. I’ve often used this window to trigger my Mayhem Devil as many more times as I can, killing off the rest of their creatures before I allow my opponent’s final Mayhem Devil trigger to resolve and kill my Devil.”
Rakdos Sacrifice vs Sultai Midrange
This is one of the swingiest match-ups in Historic. It often feels like you have to play as perfectly as possible to fight against a good Sultai player, but once you feel comfortable in the match-up, it gets a lot easier.
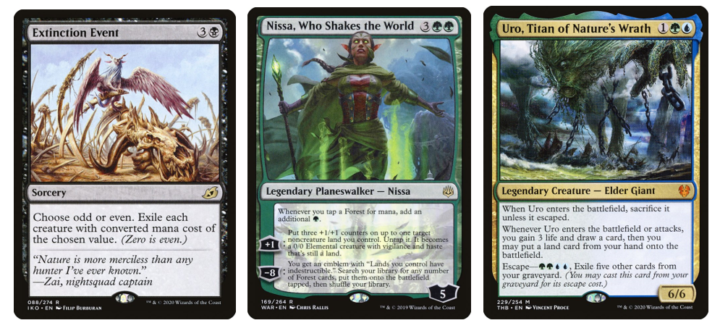
In the early game, it makes sense to get as aggressive as possible, ideally with a sacrifice source to respond to a board wipe — typically Extinction Event or Languish. This is a weird match-up where you can be the aggressor, play the long game with your opponent, or a little of both, depending on what cards they have. It’s also the match-up where Mayhem Devil damage is the most important to keep track of, whether you’re figuring out if you have lethal or if you need just one more point of damage to kill that Nissa, Who Shakes the World.
This has been one of my closest match-ups in testing, but with enough practice and deck knowledge, you may start to feel favored here.
Rakdos Sacrifice vs Goblins
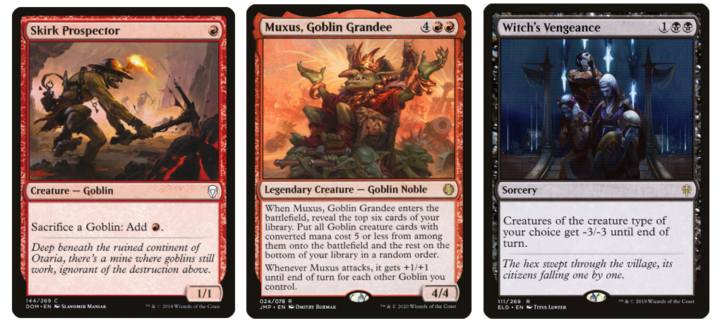
Sacrifice decks are known for being favored against Goblins, mainly because of Mayhem Devil. One trigger from Mayhem Devil turns off Skirk Prospector and slows Goblins’ development. If you’re able to assemble the Cauldron Familiar and Witch’s Oven combo or Priest of Forgotten Gods with Mayhem Devil out, it’s almost impossible for the Goblins player to find a way out of that.
While all this is positive for Rakdos Sacrifice, there are always some Muxus, Goblin Grandee hits that no one can come back from. Fortunately, this doesn’t happen too often, in my experience. In post-board games, you can turn to Abrade for added removal, and you even have Witch’s Vengeance if a Muxus hit doesn’t kill you.
Rakdos Sacrifice vs Jund Sacrifice/The Mirror
This is one of the most complex match-ups I’ve encountered in my Magic career. I could dedicate a whole article to this match-up alone, but I will try to sum it up quickly here.
Removal is key in this match-up because Mayhem Devil and Priest of Forgotten Gods are so important. Sometimes, the game comes down to who gets to keep a Mayhem Devil around for the longest, but the player who is more familiar with the match-up often wins.
Claim the Firstborn is another key card in this match-up, which means it’s important to have access to a sacrifice source as often as possible. It’s easy to fall far behind if your opponent steals a Mayhem Devil and gets to clear your board before sacrificing the Mayhem Devil as well.
Every point of damage matters in this match-up, so it’s important to plan a few turns ahead and think about how much damage you will be dealing each turn.
Sideboarding
And now the part you’ve all been waiting for: the coveted Sideboard Guide.
It’s extremely important to understand the gameplay and match-up when sideboarding with this deck, especially when you approach a deck not on the sideboard guide. This means you have to think critically about what you want to side in and why. For example, sometimes you may not be sure when to sideboard Thoughtseize against Sultai Midrange. Against most Sultai lists, I do not side in Thoughtseize for a few reasons: it helps fuel Uro, Titan of Nature’s Wrath; it often prevents me from making an alternative play; and it is often not impactful enough when they have so many strong cards at their disposal.
So, when should you side in Thoughtseize against Sultai Midrange? The first step is asking yourself why you want Thoughtseize in your deck in the first place. I would want Thoughtseize in my deck to ensure a card doesn’t resolve in the first place. Cards like Nissa, Who Shakes the World and Hydroid Krasis are great examples of cards that put your opponent so far ahead that removing them once they resolve won’t help you. While I wouldn’t consider Thoughtseize for Nissa alone, I might consider a couple copies of Thoughtseize for a deck I suspect has four Hydroid Krasis in the list.
Keep in mind that this isn’t the “end all be all” of what to side in and out in every match-up; Historic decks are constantly changing, and everyone builds their decks differently. Sideboarding is ultimately contextual, and it’s important to understand the function and utility of all your cards.
Vs Sultai Midrange
+3 Noxious Grasp, +1 Skysovereign, Consul Flagship, +2 Soul-Guide Lantern
-2 Scrapheap Scrounger, -2 Dreadhorde Butcher, -1 Midnight Reaper, -1 Woe Strider
Vs Goblins
+3 Witch’s Vengeance, +3 Abrade +1 Thoughtseize
-3 Midnight Reaper, -2 Scrapheap Scrounger, -2 Chandra, Torch of Defiance
Vs Jund Sacrifice
+2 Noxious Grasp (if Korvold), +2 Abrade, +1 Skysovereign, Consul Flagship, +2 Soul-Guide Lantern
-2 Scrapheap Scrounger, -1 Midnight Reaper, -2 Dreadhorde Butcher, -1 Woe Strider (if Korvold), -1 Claim the Firstborn (if Korvold)
Vs Azorius Control
+3 Thoughtseize, +2 Noxious Grasp, +2 Abrade
-1 Cauldron Familiar, -2 Priest of Forgotten Gods, -4 Claim the Firstborn
***
Overall, it’s hard for me to recommend any other deck in Historic if you’re trying to win a tournament or climb the Arena ladder quickly. With seemingly no bad matchups outside of some fringe tier three decks, mastering a deck like Rakdos Sacrifice is well worth your time.

Ally Warfield is a member of the Rivals League, a full-time streamer, and a Splinter Twin apologist. Her focus is in Historic and Standard, but she also loves to dabble in Vintage and Limited formats as well.