
Kristen lends a few thoughts on how to navigate a game of casual Commander based on what seat you’re in.
I’ve been thinking, lately, about how useful data can be when reviewing games of Commander. A lot of theory and observations on the format skew toward subjectivity and anecdote, and as we all know, that’s not the most reliable type of data. One of the ways in which I hope to gather data in 2023 is through post-game analysis: I’ve set up a spreadsheet to record who wins (and how), what the decks were, what turn, and any notable cards.
While I’m excited to see how that pans out — not least to observe my win rate over time and see if I should be powering up or down my decks at all — there’s still a lot to be said for writing from experience. Today I’m going to talk, loosely, about playing your “seat” in Commander. As much as any strategy article for a multiplayer “social” format is entirely subjective, there are some observable truths, and I think it can improve your game to know them.
I want to preface this article by, again, reiterating that these thoughts may or may not apply; if you’re playing durdly battlecruiser, turn order and mulligans matter a lot less. Likewise, when playing cEDH, most of these heuristics are exaggerated greatly and can be examined far deeper, individually. Take these musings with a pinch of salt, basically, and you’ll find they’re still pretty relevant to the average game of Commander.
Playing Your Seat in Commander
When it comes to “playing your seat,” most players think of booster draft: what color should I be in and am I drafting my seat properly? You might also think about “Who’s the Beatdown,” a set of heuristics that tell you who should be playing aggressively and when the tempo shifts. Not identifying who is the beatdown can lead to game losses by misidentifying the role of your seat.
Commander is no different, and though the general concept of “Who’s the Beatdown” still applies, it’s more about who is the archenemy. Drafting, too, only applies to the draft portion of a Commander draft; after that, the game portion differs. When I refer to “Playing Your Set in Commander,” it’s about turn order, tempo and mulliganing.
Turn Order
I touched briefly on turn order before when I asked “How Much Does Going Last Suck in EDH?”
In terms of playing your seat, turn order matters a lot more than you’d initially think. Seats can change, of course, due to how the game progresses — but, generally speaking, each seat plays in a certain way.
Seats #1 and #2 set the tempo of the game. As early as turn three, those in seats #3 and #4 can start to feel the pressure if they’re not committing as hard to the board. Playing early ramp and card draw spells, or under-the-radar cards when you’re in Seat #1 or #2 can be a way to suss-out the other players’ intentions, often making the virtual card advantage and information gains greater for those seats in the early game.
By increasing the rate/escalation of plays, players in those seats can encourage overcommitting from other seats and are best placed to land cheap board wipes to punish those catching up. Setting the tempo in this way rewards the players earlier in the turn order, as they are playing into the wipe and best placed to recover from it. They usually have access to more mana, and more cards.
Seat #2 is the seat that chooses whether to match or exceed Seat #1’s tempo, or let them become archenemy. Seat #2 is arguably the most important seat in terms of the tempo of a game: their choice on whether to race Seat #1 or to settle into a table-cop role that is hopefully mirrored by other seats dictates the style of early to mid-game gameplay.
In a nutshell, Seat #2 dictates the rate of response and is the most likely to seize the tempo from Seat #1 in the opening turns of the game, depending on how their start goes with acceleration and threat deployment.
Any seat can become Seat #1, especially if they get the right start. But given that the natural seat order still dictates tempo to some degree, it’s hard for Seat #3 or #4 to wrestle away the lead early in the game and hold onto it.
The Seat #3 Conundrum
Seat #3 can sometimes be the hardest seat to play and, personally, my win rate is lowest when I’m in it. Seat #3 (and sometimes Seat #4) are caught in the “tempo trap.”
The tempo trap is kind of like being caught between tidal currents and experiencing the full whiplash of being at the mercy of greater forces. Where the first two seats are usually setting the tempo, this seat is often trying to catch up, so it feels the squeeze from both directions.
The seats before them will wipe away Seat #3’s progress in calculated plays informed by virtual card advantage. And Seat #4, likewise, will hit the reset button when feeling too far behind.
Effectively, this leaves Seat #3 often feeling punished for just trying to play the game. They can’t anticipate as well as Seats #1 and #2, and choosing to react before Seat #4 can lead to giving away much needed tempo, letting the Seat #4 rebuild first.
Seat #4 is in catch up mode, and is usually playing from behind. This seat finds it hard to be the early threat, and even if they do get the perfect hand, they’ll often find it more difficult than other seats to bounce back into the game if they’re stone-aged with removal.
In terms of tempo, a player in this seat should be miserly with removal in order to not be caught playing table cop when they should be trying to advance their board. Forcing seats who are in better positions to vye for Seat #1’s lead is the goal, and if you can force board wipes and removal from Seats #2 or #3, this is the chance you need to leapfrog back into the driving seat.
While always passing priority to players after you in an attempt to bully them into action can be considered bad sportsmanship, there is something to be said for not committing too many resources to plays that don’t develop your board. It’s the reason why Magic has shifted to creature-based EtBs rather than instant or sorceries, for the most part (EtBs progress your board state, right?).
Don’t be afraid to joke around that it’s not in your interests to be solving problems if you’re far behind unless the other players are similarly out of options to stop a win. Politics is a big part of casual Commander, afterall.
Sol Ring
I mentioned earlier in the article that Seat #1 isn’t set in stone, and it’s more of a role played by the person with the most developed board/game plan and the most resources. They might well be the beatdown, but they might also be playing a more controlling game, and you might be on the beatdown instead. Player removal is sometimes the only removal option available.
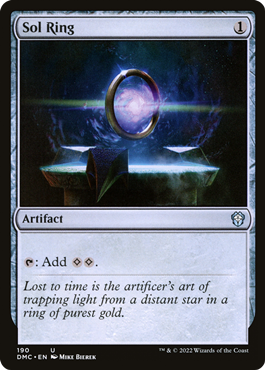
Frankly, the Seat #1 role can often come down to someone cheesing a turn-one-Sol Ring or other similar rock, and that role is even more certain if they then play a two mana rock afterward. It’s very likely that should decks like this have card draw in the Command Zone, they’ll rocket into the lead without much trouble.
Mulligan with Intent
With each seat comes responsibility, and one of these is to mulligan properly. While mulliganing to hit “lands and spells” is what’s needed to begin a game of EDH in which everyone gets to play the game, it’s not enough to guarantee a player is well positioned to win a game.
Mulliganing with intent will serve you well. It’s something I spoke on in my piece on why The Cards You Play In Commander Don’t Matter: “a game plan and interaction for what your opponents could play is often more important than the cards you want to play or open with.”
Resource management is key to winning a game of Commander, but so is sequencing, and sequencing starts with Mulligans. I place a greater weight on a hand that can cope with what the table is threatening to do than on what I personally want to achieve, but that’s because I go into games wanting to try and win. Chances are, if you’re reading this article, you’re of a similar mindset.

Mulliganing for Your Seat
While there is much to discuss about threat assessment when it comes to mulliganing, let’s look solely at how to apply mulliganing with intent to our seat order.
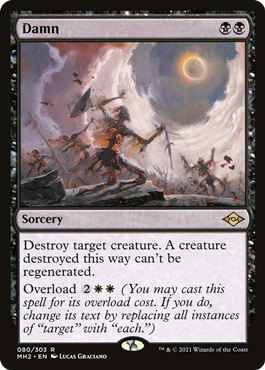
- Seat #1 has a big choice when choosing an opening hand: it needs to decide whether to become the archenemy out of the gates or keep a serviceable hand with the knowledge that other seats might take their role with a better hand. They are poised to keep cheap board wipes like Toxic Deluge and Blasphemous Act, and protection for key pieces they aim to stick. Blacksmith’s Skill, Heroic Intervention and Shelter are good cards to have here. Seat #1 arguably has the most flexibility when it comes to opening hands, as their overall seating position won’t change even if their role does. They can leverage the turn order to the fullest.
- Seats #2 & #3 should prioritize having answers for whoever takes the lead, whether that be Seat #1 or someone else. Cheap removal, like Swords to Plowshares, Nature’s Claim and the like are good here, but putting the removal and development on utility creatures is better. Forcing the seats who are behind to deploy blockers or remove creatures with attack/combat damage triggers going their way should be a priority, as you are seeking to not get caught in the “tempo trap.” It’s also important to have a solid game plan that seeks to take advantage of shields down moments from other seats.
- Seat #4 is the trickiest seat to mulligan from, and it ideally wants to find card draw and acceleration to offset their seat at the table. Taking a Sol Ring start in this seat is tricky, as if it’s too aggressive, it can lead to being stonewalled out of the game. A player in earlier seats has the luxury of offsetting being the focus of removal in the early game by being ahead or not being at risk of falling into the “tempo trap.” When in this seat, it’s important to match but not exceed the tempo of other seats for the developing stages of the game. If you can do this, you’re well positioned to turn the corner to a win. Seats #3 & #4 especially benefit from Deflecting Swat/Bolt Bend effects to try and claw back tempo.
I could probably expand this into a full article on mulligans in Commander, but you get my drift.
When it comes to Commander, it’s overwhelmingly a casual format. We sit down to sling spells, catch up with friends and showcase our cool decks.
While that is true for the most part, there are those outside of cEDH circles who seek to hone their skills and play to the best of their ability. That’s OK, especially when you find some like-minded friends who enjoy pushing the ceiling of deliberately powered-down decks.
I hope this article on playing your seat has been helpful for you, and if you have any further questions on the ideas (and I do stress that these are ideas, and not rules to live by) mentioned in this article, do let me know on Twitter.

Kristen is Card Kingdom’s Head Writer and a member of the Commander Format Panel. Formerly a competitive Pokémon TCG grinder, she has been playing Magic since Shadows Over Innistrad, which in her opinion, was a great set to start with. When she’s not taking names with Equipment and Aggro strategies in Commander, she loves to play any form of Limited.