
Once more, with feeling! We’re looking at layers again today, mostly because there’s still a lot of weirdness that goes on with the different layers interacting with one another. Getting the order of operations down can be a little tricky, but it’s worth hammering home.
So, to start, a quick review of what the layers are, along with examples of cards of abilities that affect those layers:
- Copy – Phyrexian Metamorph, Phantasmal Image, Clone
- Control – Control Magic, Switcheroo, Threaten
- Text Changing – Trait Doctoring, paying the Overload cost of a card.
- Type Changing – Blood Moon, Spreading Seas, Sea’s Claim
- Color Changing – Painter’s Servant, Deathlace, Moonlace, Choaslace, all the laces!
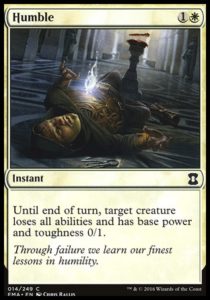
- Ability Adding/Removing – Humility, Overwhelming Splendor, Gravity Sphere
- Power/Toughness Modifying – The five sublayers of this are what we’re focusing on today! Those sublayers are:
- Characteristic Defining Abilities – Tarmogoyf, Keldon Warlord
- Setting – Again with Humility/Overwhelming Splendor, Turn to Frog
- Modifying – Giant Growth, Titan’s Strength, Disfigure
- Counters – Travel Preparations, Wither/Infect creatures
- Switching – Twisted Image, Inside Out
All right, got that? Great! Don’t worry if this is a little daunting, it doesn’t come up that often except secretly it does ALL THE TIME LIKE RIGHT NOW.
SCENARIO

Ada is playing against Martin. Ada controls a Tireless Tribe. She enters combat, and swings with the Tireless Tribe. Martin declares no blockers.
Get ready – things get way more complicated from here.
Ada casts Berserk on Tireless Tribe, and then, maintaining priority, activates its ability once and casts Twisted Image on the Tribe. Martin, in response, casts Disfigure, targeting the Tribe. Ada, in response, casts Titanic Growth on it as well. Once more in response, Martin casts Humble on the Tribe, and then casts Scar, also on the Tribe. Lastly, in response to Scar, Ada activates the Tribe’s ability one last time.
When the dust clears, what is Tireless Tribe’s power and toughness, and is it still alive?
SHORT ANSWER
Tireless Tribe is a 10/11 that is indeed still alive and attacking.
QUITE LONG ANSWER
We’re going to end up looking at every sub-layer in Layer 7 except 7a. Ada’s last activation of Tireless Tribe’s ability means that it won’t die to Scar, which means that we have a whole mess of a stack to get through. After Scar resolves, Tireless Tribe is a 1/5 with a -1/-1 counter on it, making it an 0/4. Humble resolves, turning the Tribe into an 0/1 in Layer 7b. If we move on to the next layer, 7c, Tireless Tribe still gets +0/+4 from its activated ability (even though it no longer has the ability, any activations of it on the stack will still occur), turning it into an 0/5. Then, in 7d, we account for the -1/-1 counter, turning the Humbled Tribe into a -1/4. But remember, and this is important – it’s still an 0/5, just with a -1/-1 counter.
Next on the stack is Titanic Growth, growing the very confused but still-not-tired Tribe into a 3/8 (or a 4/9 with a -1/-1 counter). Disfigure comes next, shrinking the Tribe back down to a 1/6. And here’s where things start to get wackier.
Twisted Image resolves, turning the Tribe into a 6/1 (a 7/2 with a -1/-1 counter). Then, the Tribe’s ability will resolve…turning it into a 10/1. Remember, switching applies last, in Layer 7e (after modifications, in Layer 7c), so the +0/+4 applies before the switch.
When Berserk finally has a chance to resolve, it sees a 10/1, and so gives the Tribe +10/+0 – which, again, will apply before the switch. After everything is said and done, we end up with a 10/11 creature with no abilities.
If you’re still confused, let’s look at it a different way. Given that the Tribe never dies at any point during this madness, we can look at each sub-layer within Layer 7 individually to see exactly what’s happening.
7a, Characteristic-Defining Abilities: Nothing to see here. Move along.
7b, Setting: Humble applies here, turning the Tribe into an 0/1.
7c, Modifications: A whole mess of things happen here, and they all happen at once. The Disfigure, the Titanic Growth, the Berserk, and each activation of the Tribe‘s ability all apply here. The only real tricky bit in this is figuring out what value for X Berserk ends up with. In this example, X=10. So all of the modifications we’re mashing together are: +0/+4, +0/+4, +4/+4. +10/+0, and -2/-2. Add those all together, and you get +12/+10. At this point, we have a 12/11 creature.
7d, Counters: Scar puts a -1/-1 counter on that creature, giving us an 11/10 attacker.
7e, Switching: After all that, here’s where we apply Twisted Image, giving us our final result: an attacking 10/11.
Granted, it’s pretty rare for things to get that convoluted. Most of the time, you’ll only need to apply one or two of those sub-layers to get your result. But working through situations like this in your brain will help the less convoluted stuff come much, much easier.
And with that, we’re done with layers for now. Rejoice, and be glad! Layers are, as mentioned several times throughout these past two articles, a pain to get down, but they’re such a large part of the underpinnings of the rules for the game that they’re worth devoting some brain space to understanding.
As a last note, shout out to Kris Ferderer, an L2 in the Seattle who works for Card Kingdom. The above scenario is an adaptation of a question he likes to use while training judges.

Chris is the Associate Media Producer at Card Kingdom. He would like to apologize to his son for not holding onto more cards from when he first started playing, as that likely would have paid for college. He enjoys pretty much all formats of Magic, but usually ends up playing decks that make other people dislike playing those formats with him.