
We’re getting very close to the historic day when Lord of the Rings: Tales of Middle-earth releases, and looking over that full set spoiler has got to have any Tolkien fan rubbing their hands with excitement! Not only is having an entire set to explore this world great for characters and lore, but seeing Tolkien’s mythos through the lens of format design is most intriguing. The Lord of the Rings draft experience could be one for the history books.
Will Tales of Middle-earth draft capture the feeling of heroic missions and desperate military clashes at the end of an era? What signature mechanics will define the hobbits or lingering elven hosts? Is it OK if you play the servants of both Mordor and Rohan in the same deck?
We’ve got at least some of the answers you seek in the Card Kingdom Draft Guide for Lord of the Rings: Tales of Middle-earth. Let your Limited adventures begin here!
ONE RING (PER PLAYER) TO RULE THEM ALL
Perhaps the most important question in terms of designing a format that feels like The Lord of the Rings is how to include the titular jewelry. The One Ring does exist as its own legendary mythic rare card, but that’s not something that’s going to be a big part of the Limited experience.
So, rather than rely on players opening certain rares to satisfy their Ring-lust, Wizards of the Coast turned it into a mechanic so prevalent that it will influence how we evaluate every other card in Tales of Middle-earth.
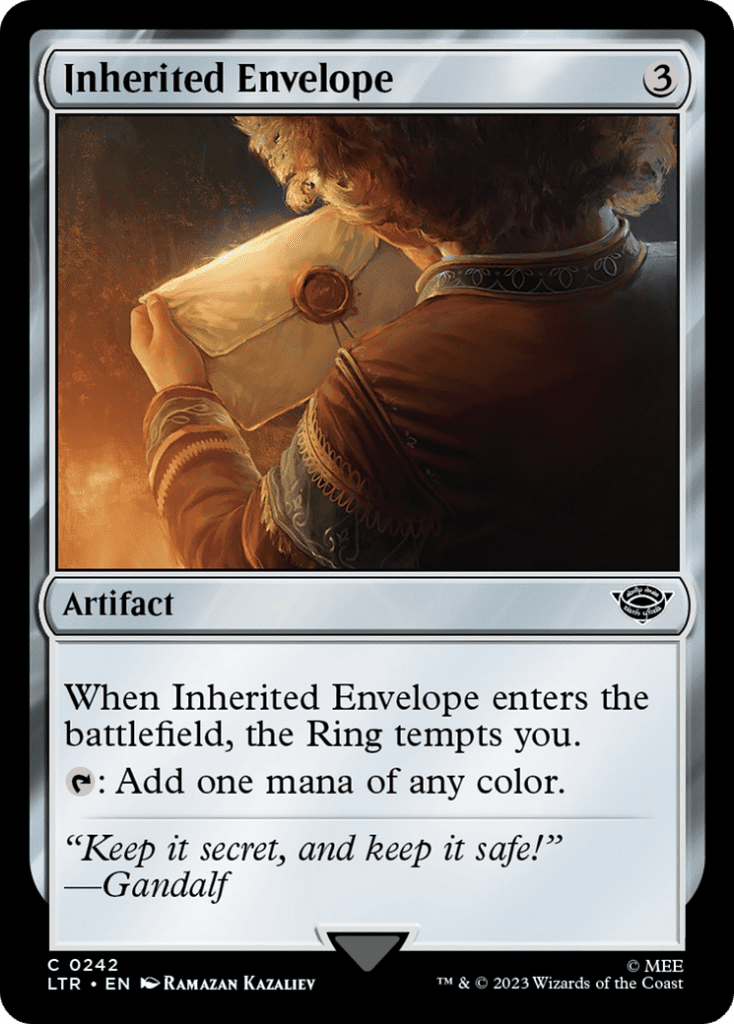
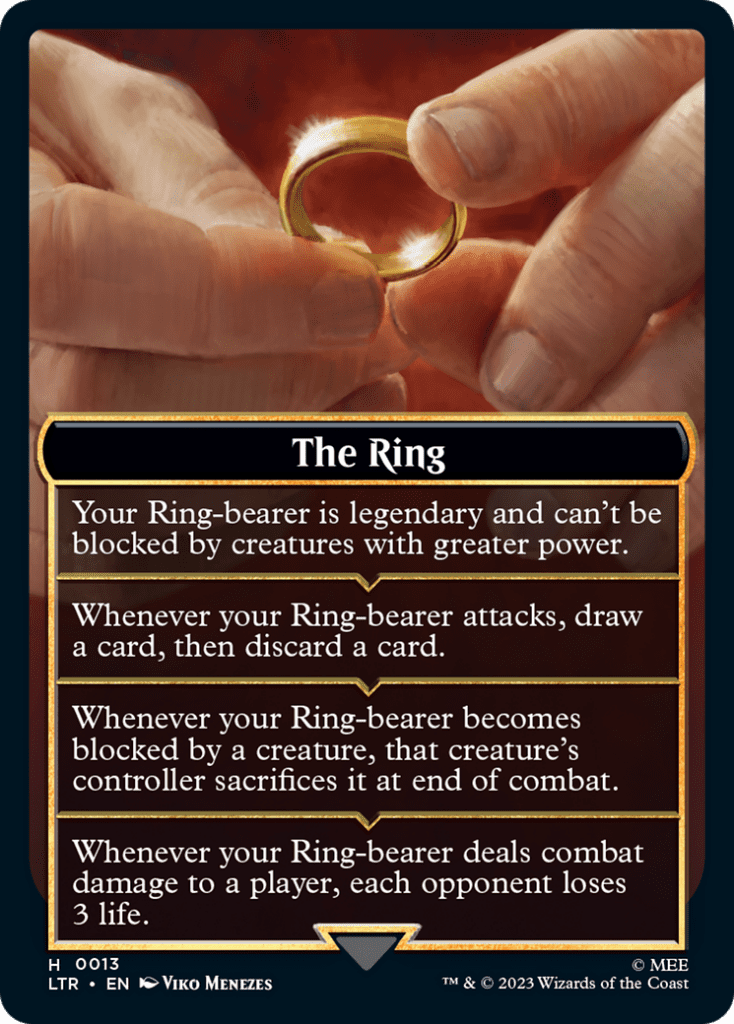
That mechanic is “The Ring Tempts You,” which appears at common and up across all five colors. In gameplay terms, it’s most similar to “Venture into the Dungeon” from Adventures in the Forgotten Realms: a scaling rewards track that (at least in Limited) certain cards will be able to advance with a one-off trigger.
Only a specific handful of cards below rare can generate multiple TRTY triggers without recursion, but from the sheer quantity of cards that interact with this mechanic, this is more of a speed-bump on your road to full Ring power than a true barrier.
The Ring is also quite useful even without all its abilities, although admittedly its true impact will also have a lot to do with who is carrying it.


That’s right — if you thought Frodo Baggins was always an odd choice to carry out the ultimate heroic mission, you can now rewrite the saga with a Ring-bearer of your choosing! All benefits of The Ring emblem apply to the creature you most recently chose to bear it. Any time you are Tempted, you can nominate a new one.
An active Ring-bearer represents a steady tax on your opponent’s resources, and for some decks this mechanic is their most reliable endgame win condition. But even if you do have a different plan in mind, be prepared for the gameplay of these Ring-bearers to define your matches similarly to how Incubate did in March of the Machine or poison counters did in Phyrexia: All Will Be One.
OTHER ALL-COLOR MECHANICS
Of course, TRTY is not the only thing going on in Tales of Middle-earth that might shape how we value different cards. There are a few other, major, color-spanning themes to address, and a few more that are specific to certain archetypes. The big two to keep in mind are tokens (especially Food, but also Treasure and Army tokens) and legendary creatures.
Both of these are pretty straightforward: you either have something in play with the right word on its typeline or you don’t. It’s worth noting that any creature chosen to be your Ring-bearer gains the legendary supertype, so that specific box seems easier to tick than you think!
Of course, there’s plenty of bonafide legendary creatures as well, even at uncommon. These legends offer powerful Commander-style effects that enhance a specific mechanical theme, and which ones you’re able to find in packs can certainly offer you direction for a given draft.
The token synergies are a slightly more nuanced group, both in what they’re mechanically asking for and what they demand from you. Some cards are specific about which kinds of token they work with, like Food or Armies.
Others are more generic, asking only that some kind of token be sacrificed or created. Like TRTY and legendary synergies, some form of token mechanics are common across all five colors — although food specifically tends to appear in white, green and black, and army in blue, black and red.
SHAPE OF THE FORMAT
A full mathematical analysis is beyond the scope of this particular guide, but even at a glance it’s clear that creature sizes are smaller on average in Tales of Middle-earth. Perhaps it’s because The Lord of the Rings is more often a story of men, elves, orcs, hobbits and other humanoid-sized creatures. Regardless, the result is a situation where cards are going to trade more often in combat, and where having a wider board is going to matter a lot.
We can also expect things that let you avoid trades to be extremely potent, like first strike or any combat trick. Given the added utility of combat tricks in letting you “ambush” opposing Ring-bearers with a creature of lesser power (the only kind allowed to block them), I’m going to value them more highly than usual.
Removal spells also take on an extra significance when you consider the necessity of slowing a Ring-bearer down. Yes, your opponent can choose a new one as soon as they find another TRTY trigger, but that could be worth a few extra turns for you to turn things around.
Those turn-arounds will be more common in Tales of Middle-earth, in part due to the near-universality of Foods as a source of lifegain. While you’d rather not be chowing down on them unless absolutely necessary, a stockpile of unused Foods can potentially buy a lot of time if you’re forced onto the back foot.
The difficulty of preserving creatures through combat will likely create board stalls, during which the hard-to-block Ring-bearers can become the most significant threat. However, the specific evasion granted by The Ring (essentially skulk) means this is usually a single, small creature chipping away at your life — the kind of situation where three life from a Food really matters.
I’m not ready to proclaim that Ring-bearers are ineffectual (if nothing else they offer some nifty card selection). But I’m definitely going to try and have some alternative win conditions that are capable of punching through this kind of Food-based defense.
The other major point of note, as always, is how well the set supports multi-color drafting. In this case, I’d say the support is about as strong as you’ll ever get outside of sets where multi-color factions are a primary focus!
There are few cards with heavy color requirements, and the actual fixing tools are comparable to MOM, or even a little stronger! Perhaps the strongest of these are the cycle of big, expensive common monsters with basic-cycling abilities; these are always excellent picks at any point in the draft to give you the option of a splash.
Besides those beasties, we have access to a classic three-drop mana rock (which also grants a TRTY trigger), an Evolving Wilds variant and a cheap mana-filtering defender as common colorless options. A few other cards let you filter colors as a one-off activation or after meeting certain conditions — great if you’re just trying to support a single off-color rare.
As usual, green has a whole other set of options and will be a great base color to start your drafts in if you enjoy the “five-color good stuff” playstyle. But even outside of green, it’s clear the “two-and-a-half-color” will be the norm for decks, with true three-color drafting or multiple splash colors not out of the question.
DRAFT ARCHETYPES BY COLOR
The biggest reason for defaulting to two-and-a-half colors is the distribution of strategic archetypes in this set. Tales of Middle-earth is advertised by Wizards of the Coast as being built around the ten color pairs, but there is a significant amount of overlap into a third color for most of these, if not an almost identical second pair that will likely blur together into a single archetype given how plentiful the fixing is.
I’ll still analyze each color pair in its own right, but I’d encourage drafters to keep an open mind about cards from outside “their pair,” even going into pack two and three. It’ll take a strong coalition to win the great struggle of our time.
Blue/white: Go-Wide Control
I mentioned that having mostly similar-sized creatures in the set might lead to a lot of board-stalls, and this is the archetype most excited about it. The “draw your second card” effects are easy to trigger every turn while still expanding your board, and they help to inform a very slow and value-oriented playstyle.
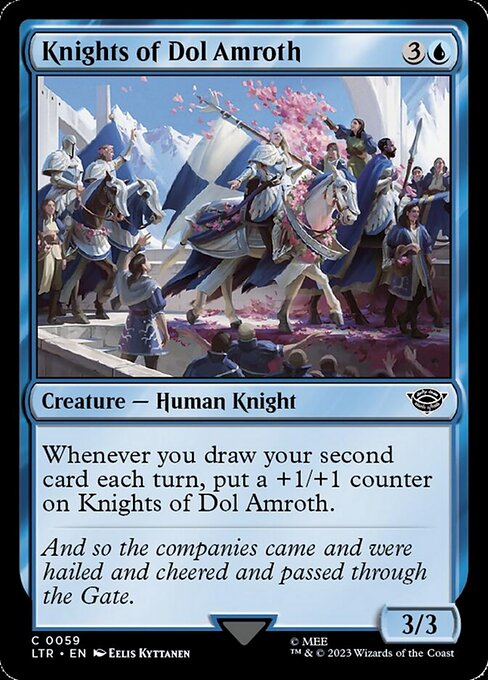

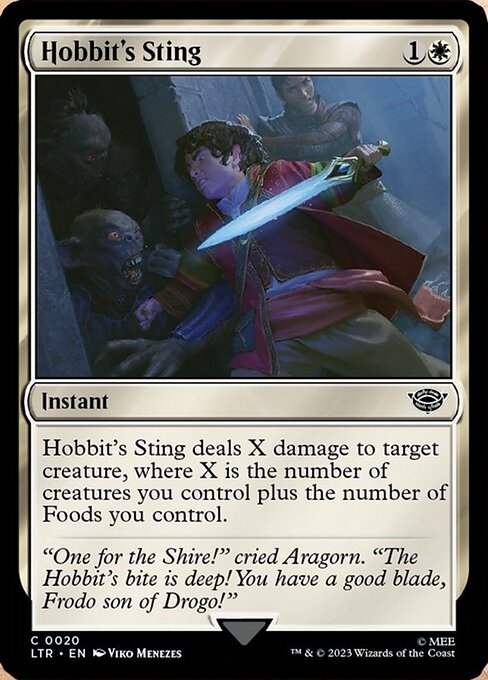
Using these and other recurring resource engines (including your Ring-bearer), you are able to gradually pull ahead while discouraging any attack with a broad sea of tokens. Besides multi-blocks being very powerful this set, having such a wide board unlocks strong removal like Hobbit’s Sting.
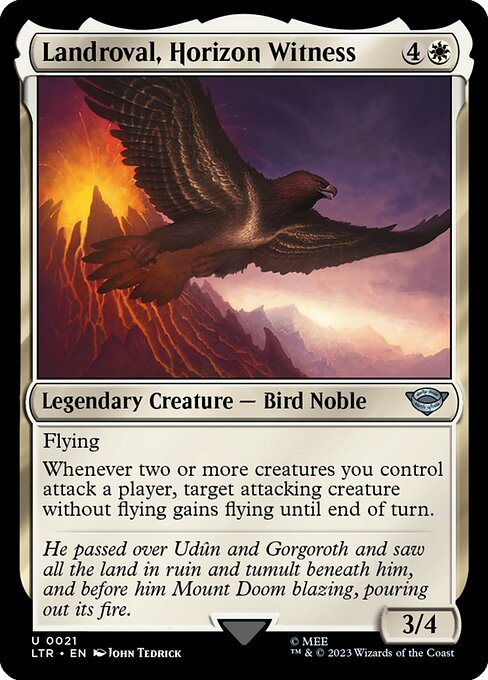
There’s a few ways you can grind out a win from such a dominant defensive posture: you can chip away their life with your Ring-bearer or an Eagle air force, or even piling equipment onto one token at a time and forcing advantageous trades.
But the big win-con is going to be white’s various team-wide buffs. Just pump up your “defensive” army of tokens and charge forth from Minas Tirith to crush the foe!
Red/white: Human Aggro

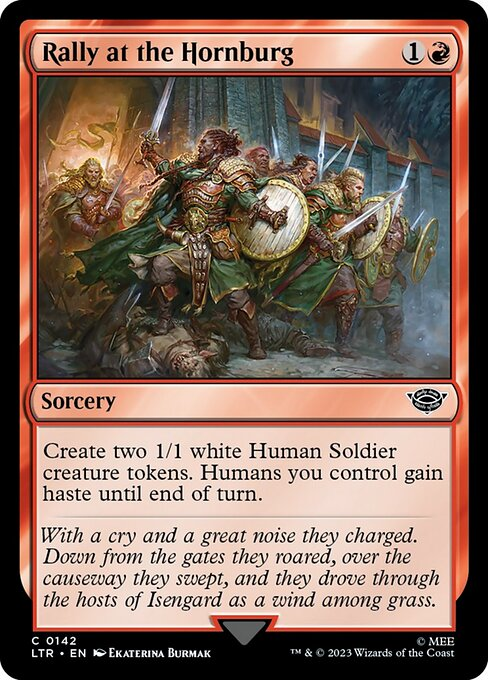
RW is where you’ll actually find the human synergies, and they’re pretty much all aggressive. You’ll have a lot of small humans to benefit from team-wide buffs as well as a few bigger bodies to diversify your forces and benefit from keywords.
Unlike UW, you don’t benefit as much here from waiting around until you have a critical mass of creatures to buff, but you can’t really afford to be “chump attacking” and losing valiant Men to the army of Sauron. Enter your formidable removal package, which combines a lot of efficient, flexible burn spells and a few white spells for bigger stuff.
All of these are best used to brush enemy blockers aside so your forces can safely extract their pound of flesh until the enemy is weak enough that you no longer care about attrition.
Finally, I should point out that this is a perfect example of how decks in Tales of Middle-earth should definitely be looking to splash: both the UW and RW decks will be significantly improved by adding a couple of key uncommons from the “third color.” In particular, I think adding an aggressive Humans payoff like Erkenbrand can do wonders for the UW deck, but I wouldn’t say no to extra flyers in RW either!
Green/white: Food Aggro

Yes, the hobbits-and-ponies archetype is surprisingly aggressive — although it’s less surprising when you consider the nature of its mechanics.
The creatures of the Shire are mostly on the smaller and cheaper side, incentivising a fast-paced start. And while Food by itself is hardly an aggro mechanic, there are a ton of cards here that transform your second breakfasts into an extra-large helping of pain (for the opponent).
Between fight spells, permanent +1/+1 counters and a lot of combat-trick type effects, the Hobbit army absolutely marches on its stomach. So long as you keep food on the table, it will be very difficult for the opponent to block effectively, and thus to stabilize against your hairy-footed assault.
I’d normally be wary of trying to play enabler-payoff mechanics in a deck that can’t wait around until it draws both halves of the equation, but Tales of Middle-earth seems to have a very high saturation of its key mechanics — food included. This means you’re free to prioritize the strong early curve of creatures you need during the draft phase, confident that you’ll be able to eat well regardless.
White/black: Tokens Midrange
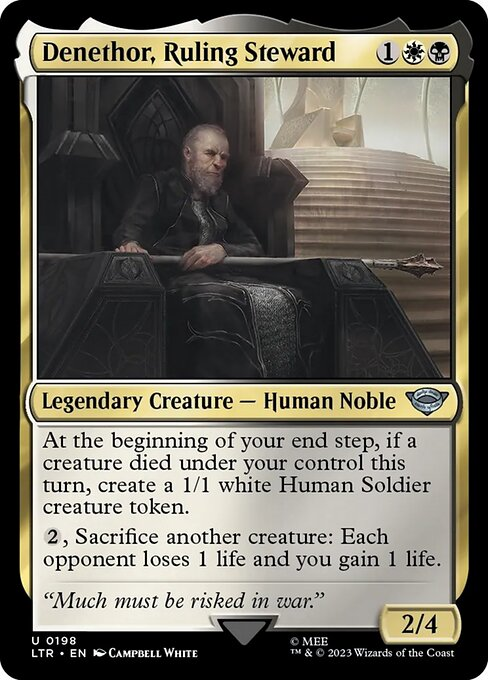
Even as a WB fan, I have to admit this seems like one of the less cohesive color pair archetypes. Not only do we have the confusing lore situation of playing Denethor and Rosie Cotton alongside the orc armies of Mordor, but the mechanical synergies are far less prominent here than they are in say, GW food or RW humans.
That can still be a blessing, though, as the generic “tokens” theme is very open to different splashes or simply a fundamental, removal-and-good-cards approach to drafting.
There actually are quite a lot of good cards to be had here, mostly playing around that general idea of token synergies. Not all of them work well together, though, and you’ll probably want to be clear about whether you’re using your tokens as a combat force or as sacrifice fodder.
This decision will also tie into your overall color selection — a deck splashing red for more cheap creature tokens and burn will lean into Aristocrats-style Aggro. Meanwhile, a blue splash can set you up to play entirely from a defensive mindset and either drain or mill opponents out.
Green is your most obvious and flexible third color, though, with the cross-synergy of GW Food effects hard to ignore (and some decent food generation in black to boot).
Regardless of what you do with your tokens, the biggest priority should be maxing out your impressive arsenal of unconditional removal. You need to be able to stop anything that can get around your tokens, including a steady stream of Ring-bearers.
Green/black Sacrifice Midrange
Further blurring the lines between the Abzan color combinations, green-black has a heavy emphasis on sacrificing things, with Food tokens being its bread and butter. Unlike GW, these effects are less focused on buffing up attackers and getting them in, instead generating extra value or sometimes removal effects to grind towards victory.
This slots into the gap between GW and WB so well that it really serves you better to think of them as a single option in the draft. You’ll just end up angling toward somewhat more-aggressive or less-aggressive Abzan Tokens decks based on the particular cards you find.
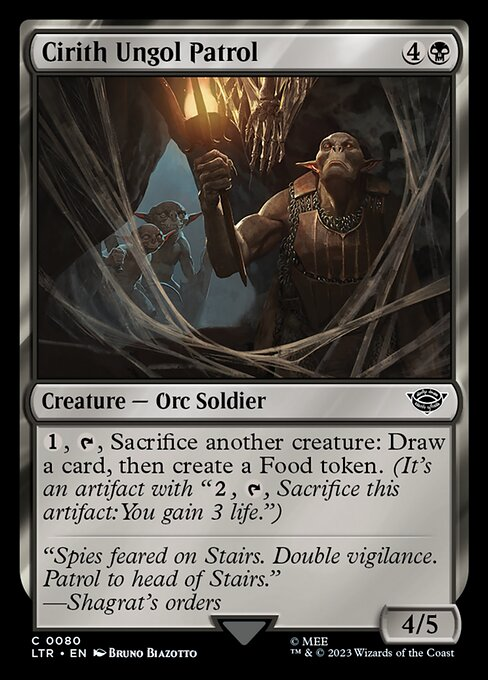
Green-black mostly falls on the less-aggressive side, though, since its big advantage comes from attrition through removal. The recursion in the set is actually somewhat worse than usual, but you’ll be able to draw plenty of cards thanks to Cirith Ungol Patrol, Nasty End and Morgol Muster.
Speaking of Morgol Muster, repeated sacrifice effects are historically the most efficient way to utilize Amass, since you can potentially get an entire sacrificed creature of value off every amass trigger. So don’t be afraid to take those cards even if you aren’t splashing red or blue to be “in” the army theme — they feed the carrion just as well as anything else.
Red/black: Army Aggro
I’m extremely pleased to see the return of Amass as a mechanic, but also just to see RB play out as a more traditional Aggro deck instead of being forced toward sacrifice synergies. Since RB tends to not draw a lot of easy cards, burning your resources away even faster is not a great recipe for success.
But here we have a deck and a mechanic that actually helps you make extra attackers over time — and I anticipate RB decks being pretty scary as a result.
Amass is certainly a big part of it, and it’s a mechanic that can take a little while to get used to. To maximize its impact, you either want your Army to be dying a lot, or not at all. There’s no middle ground.
So, there’s definitely still incentive to play the kind of reckless, all-in Aggro style RB is famed for! Going from a 1/1 to a 2/2, or a 2/2 to a 3/3 usually won’t change the boardstate much, and when Amass is a big part of your spells it can make them feel quite underwhelming.
But remember, there’s not really many massive creature cards in Tales for Middle-earth. So if you’re able to amass your way up to a 6/6 or larger, then your Army has a decent shot at taking over the game. Backed up by instant-speed removal or the first strike from Rush the Room, you can absolutely devastate the inevitable multi-block attempt and cruise to victory.
Blue/black: Army Control
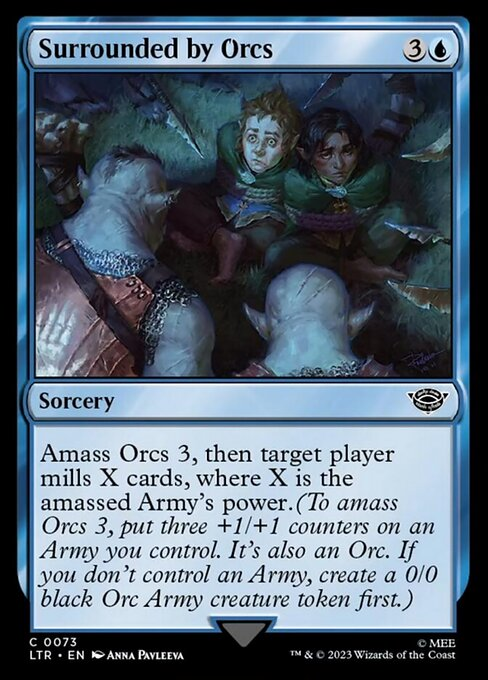
Mill decks are always a serious threat in 40-card formats, and oh boy does this deck look serious. Besides the various interactive spells, an obvious two-card engine of Surrounded by Orcs plus Treason of Isengard gives you a straightforward and powerful source of inevitability — and both are at common!
Getting at least a couple of copies of Surrounded by Orcs does seem essential to playing UB as your base colors, because it really doesn’t have a lot of other obvious win conditions. Blue has solid counterspells (Glorious Gale looks very strong in this format), and its bad removal is pretty much made up for by black’s numerous options. But unless you’re milling them out or attacking with an army, you will really be reliant on the Ring-bearer to grind opponents down… or perhaps to run them completely out of creatures.
What this actually signals is unless you have a very clearly open run at UB in your pod, you’ll want to pick a third color to help round out any parts of the game plan you’re missing (usually the last part). White gives you the air power you need to play a very traditional control game, green gives you the chance to overwhelm on the ground. Red — the most natural tertiary color — gives you another non-combat avenue to victory: straight up burn.
Blue/red: Spellslinger
UR in Tales of Middle-earth is the home of the mighty Wizards, as well as more mortal servants of the arcane. But creatures are decidedly not the emphasis here, as all your big payoffs incentivize casting all the instants and sorceries you can muster.
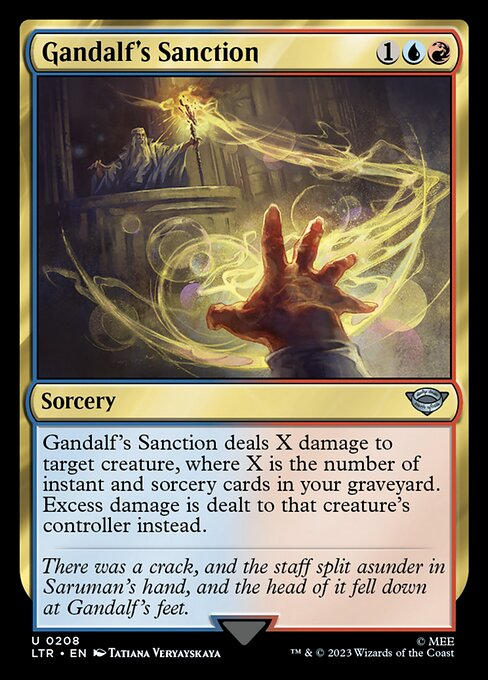
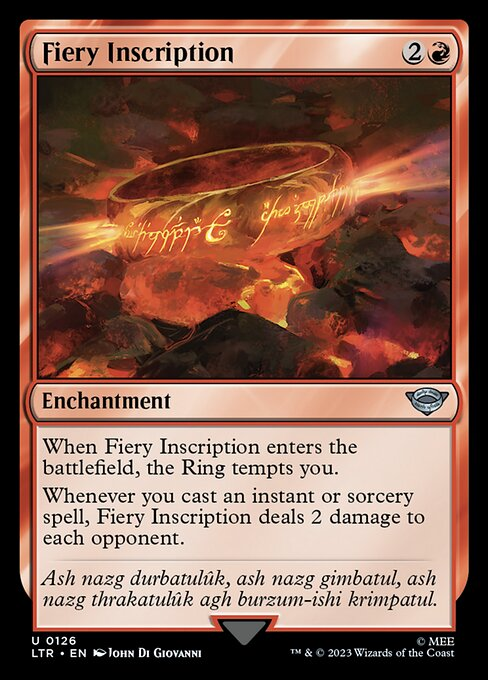
Fiery Inscription and Gandalf’s Sanction are the kind of cards that can make it tough to draft an archetype because everybody is so excited to play them! I would definitely rate Inscription a lot higher, though, as Sanction fails as a win condition vs. any kind of sacrifice outlet. Still, the actual instants and sorceries in the set seem good enough to be worth giving this deck a shot even before you consider the payoffs.
If you are able to grab a couple of these deadly uncommons, you’ll want to load up on cantrips like Birthday Escape in order to race through more triggers. More likely, though, you’ll have perhaps a single Fiery Inscription as part of a more holistic creatures-and-burn tempo strategy.
You can set up a Ring-bearer as a recurring source of damage, as well as flyers and potentially some Nimrodel Watchers, too. Blue’s bounce spells look their best in this sort of deck, as do the many powerful combat tricks across all colors.
Don’t get too hung up on “living the dream” and this color combination should prove as reliable as ever.
Blue/green: Scry Midrange
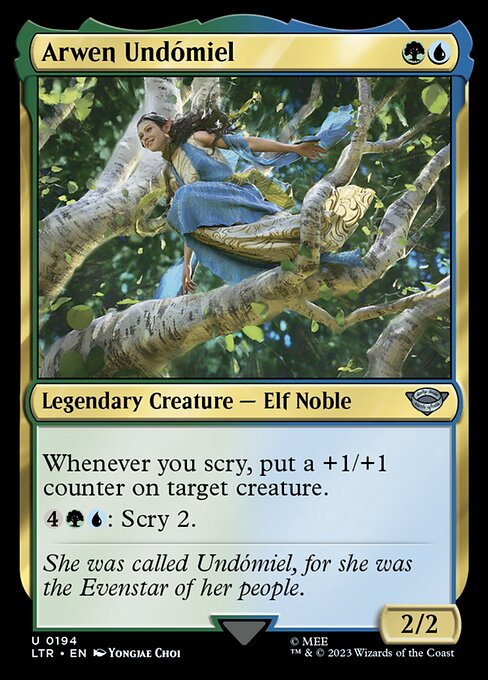
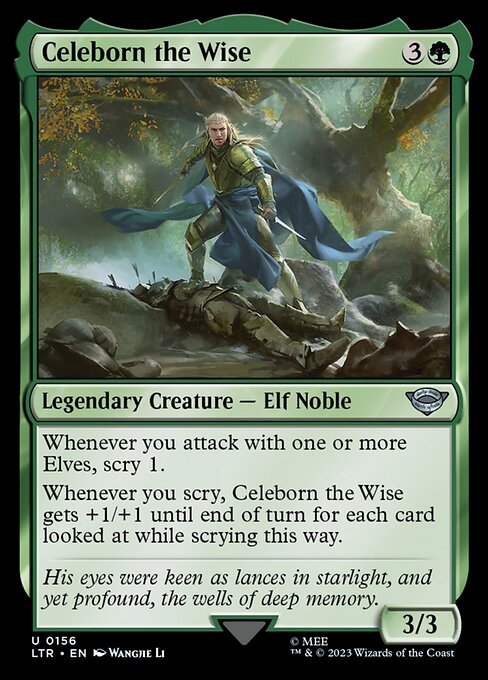
As the “best at resources” color combination, the UG theme here should be pretty familiar: ramp up mana and then play more, bigger threats than anybody else. The new wrinkle for this set is scry synergies, as introduced by the wise and far-sighted elven folk.
The actual implementation is quite different to how I initially imagined, as most of the “when you scry” triggers are combat buffs for the elves in question. This will likely make the deck better and faster at closing games once you get the lead.
Not only can you hold up countermagic to freeze the boardstate, but you can sink excess mana into scry effects, immediately increasing the power of your board rather than needing to first spend a turn drawing cards, then casting them and then eventually being able to attack.
The aggressive elf creatures are placed around three and four mana, which is right about where you want to end your curve if you’re going to be playing this style — and I’m definitely excited to try it!
There is still the small matter of how you’re actually triggering scry. Once again, Wizards has made certain that almost every spell in these colors can let you get some kind of scry value, so you won’t go wanting. But maybe the most important enablers besides the uncommon Elf Nobles are Grey Havens Navigator, Gift of Strands and Hithlain Knots.
By allowing you to scry at instant speed, they can either turn your on-scry triggers into a combat trick or give you a way to dump mana on opposing end steps if they didn’t force you to play something interactive.
Red/green: Power Matters Aggro
It does seem like Wizards deliberately tried to keep most color pairs within their very safe, traditional mechanical territory with Tales of Middle-earth — perhaps acknowledging this set might draw in less experienced Magic players.
Whatever the reason, it means that RG is back at its most “Hulk SMASH” in terms of gameplay and archetype mechanics. You play the biggest creatures you can, all the way up the curve and you attack with them. Just as Richard Garfield (the Lord of the Cards?) intended.
That’s not to say you’re casting a bunch of vanilla beatsticks here. The primary RG mechanic is “power four or greater,” a.k.a Ferocious. As previously mentioned, huge creatures are in somewhat short supply in Tales of Middle-earth, but RG definitely has the lion’s share.
When your creatures don’t come with the necessary strength of hew right out of the box, you can bulk them up with something like Gift of Strands or Gimli’s Axe. Everything I said about increasing the value of combat tricks with the Army decks also applies here, but to all your creatures!
At the same time, Green may not quite have black’s level of removal, but there are still some pretty great “fight and bite” effects in the card pool.
The big question for me with these decks will be in their early game, and in their staying power against removal-heavy decks. The former probably comes down to preference: you can certainly try and ramp past the early game with Wose Pathfinder and Entish Restoration, or you can draft some cheap aggressive creatures to be better against control decks.
I like the look of the ramp package slightly better — not least because most of the ramp also color-fixes, and splashing in legendary creatures from other colors seems like the best way to leverage the many legendary synergies in this color combination.
“COME, MR. FRODO — I CAN’T DRAFT IT FOR YOU!”
Looking at all the cards from the set together in concert really drives home how great the art direction and presentation of Tales of Middle-earth is. Standing in the shadow of not only Tolkien himself, but the widely-beloved Peter Jackson movies, Wizards has boldly laid out a new and vibrant imagining of the mythos, with some awesome designs to highlight the many proud armies and factions clashing during the final Wars of the Ring.
At least from first glance, that visual imagining is matched by a well-thought-out set design, one which is able to capture both the humble, parochial elements of Middle-earth and the sweeping epic ones. The apparent freedom to choose your own colors and blend of different mechanics should give the Draft format a lot of staying power, which is important if we’re going to wait another 30 years before the next Lord of the Rings set drops!
Jokes aside, I hope this guide helps you all take a good first step on your long and eventful journey through Tales of Middle-earth. Enjoy a last quick list of my favorite, generically-good commons in each color and I’ll see you next set!
WHITE: Hobbit’s Sting, Eagles of the North, Eastfarthing Farmer, Protector of Gondor, Soldier of the Grey Host
BLUE: Glorious Gale, Surrounded by Orcs, Treason of Isengard, Lorien Revealed, Grey Havens Navigator
BLACK: Cirith Ungol Patrol, Mirkwood Bats, Lash of the Balrog, Claim the Precious, Troll of Khazad-dûm
RED: Rush the Room, Smite the Deathless, Warbeast of Gorgoroth, Haradrim Spearmaster, Improvised Club
GREEN: Many Partings, Galadhrim Guide, Mushroom Watchdogs, Galadhrim Bow, Generous Ent

Tom’s fate was sealed in 7th grade when his friend lent him a pile of commons to play Magic. He quickly picked up Boros and Orzhov decks in Ravnica block and has remained a staunch white magician ever since. A fan of all Constructed formats, he enjoys studying the history of the tournament meta. He specializes in midrange decks, especially Death & Taxes and Martyr Proc. One day, he swears he will win an MCQ with Evershrike. Ask him how at @AWanderingBard, or watch him stream Magic at twitch.tv/TheWanderingBard.