

Final Fantasy has finally debuted in Magic, undoubtedly the event of the year for this game and one of the biggest products ever in terms of hype!
While draft may not be the first thing most people are looking forward to with this release, I’ve come to expect the Limited design team at WotC will deliver every set. Fortunately, I can attest that those high expectations were met with Final Fantasy. This Draft format offers a wonderful mix of Magic fundamentals and cool, thematic new ideas which help bring the legends of the Final Fantasy franchise to life.
Read on for a detailed explanation of how to strategize, pick cards and deckbuild in Final Fantasy Draft!
SHAPE OF THE FORMAT
Part of what gives this Limited format that “fundamentals” feeling is the slower, more forgiving gameplay. It’s not quite in the slowest category with sets like Midnight Hunt, Dominaria United or Brothers’ War, where boardstalls are the norm and drafting aggro is a fool’s errand. But you can regularly get away with hands that have no plays until turn three or four and not end up too far behind on life. There’s also a reasonable amount of lifegain available to help you stabilize after a bad start.
Knowing this should influence all your other strategic decisions. It means you can risk playing ramp spells or “do nothing” permanents on-curve. Slow-developing cards (like effects which count cards in your graveyard) are viable in any deck, even without great supporting synergies. You can even mulligan more greedily, as a one or two card deficit matters less over longer games with more draw steps.
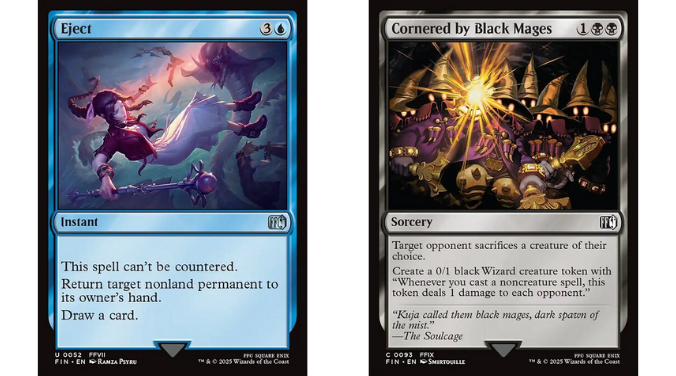
Like most sets, it’s the cost and nature of the removal suite which influences the speed of play. The removal spells in Final Fantasy are just a little weaker and more expensive than we’re used to, or depend on synergies which make them unreliable. Eject, Cornered by Black Mages, Ice Magic, and White Auracite are all good examples of cards costed well above comparable spells in other sets.
For Suplex, Chocobo Kick and Sidequest: Hunt the Mark, being sorcery speed limits their flexibility and big-play potential. This is especially painful for the cheaper cards, which you might otherwise use to double-spell in the midgame or manipulate combat math. Other removal spells are made unreliable by their dependence on specific gamestates. Summon: Esper Ramuh and Slash of Light can certainly perform well, but there’s also plenty of times (especially early game) where they simply won’t work when you need them to.
All of this means it’s harder for aggressive decks to clear away blockers and avoid trades, especially if they want to double-spell to increase their on-board lead on the same turn. You can still have those easy fast wins if your draft pool is favourable, but you can’t just draft red and lock in a positive win rate here!
We’ll discuss the set mechanics more in a moment when we look into the individual archetypes, but there are a few central themes that affect card evaluation.
Artifacts and enchantments are plentiful, specifically equipment and sagas, and you can fit more of them in your deck due to them being creatures (or making creature tokens on ETB). This is good for any cards which remove or synergize with those card types, like Light of Judgment. This also benefits the set’s many “cast a noncreature spell” triggers – just remember that “saga creatures” will not count there!
Landfall abilities are also quite common, even if the majority only provide temporary stat boosts, and you can find plenty of ramp effects to keep them ticking over.

Lastly, there’s a healthy supply of both self-mill effects and graveyard payoffs. Again, these payoffs are mostly modest – flashback spells or late-game engines which require additional mana investment like Ultimecia. But they are very reliable ways to pull ahead over the longer games of Magic which Final Fantasy creates.
COLOR THEORY
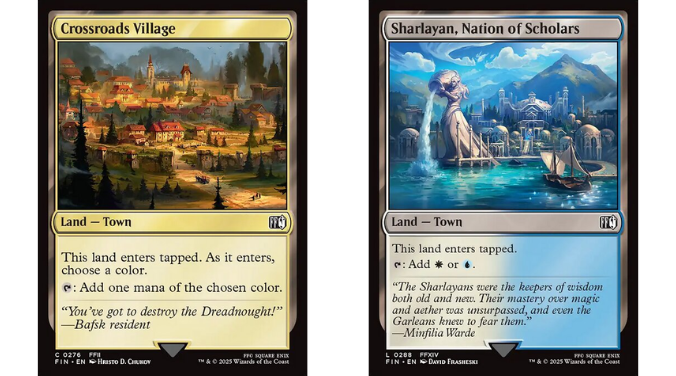
When it comes to drafting and playing multicolor decks, Final Fantasy Limited once again has a more “average” or “classic” feel. There are multiple types of fixing-land available, and even some light synergies with the town subtype to encourage drafting lots of them.
But most of the other color-fixing effects are actually ramp spells, which means they become too expensive to commit to in large numbers. This leaves us with the usual expectation of two-color decks, with the freedom to splash a few expensive and powerful cards at low opportunity cost. Green decks can take this further, and there are some “legendary matters” synergies that might lure greedy drafters towards a four- or five-color build, but this is nowhere near as viable as in, say, Tarkir: Dragonstorm.
On the plus side, the “two-and-a-half color” decks are made extremely consistent thanks to everyone’s favorite cycle of commons: the five-to-six mana landcycling monster!
If you’ve not played with cards like these before, they’re worth picking up mid-pack as insurance in case you later end up with splashable cards in that color. In games where you don’t have enough lands or the right colors to cast them, they fix that problem. In situations where you do, they’re high-impact plays! The Final Fantasy versions don’t quite have the statlines to dominate developed boards, but they still give every deck a reasonable late-game punch basically for free while reducing the rate of mana and color screw.
Between all these different common color fixers, you’ll usually have enough opportunity to pick up three or four per draft even if you aren’t prioritising them over other playables. I aim for at least one landcycler in each of my colors, as well as two fixing lands per color I’m playing.
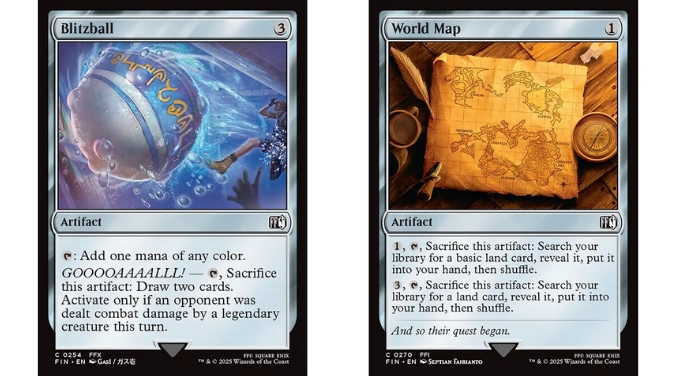
I don’t usually pick up Blitzball or World Map unless I’m playing artifact/sacrifice synergies, or I miss out on those other fixers. But the first copy of either is usually no detriment to your deck – the Map in particular is so mana efficient that I’d always prefer it to adding extra basics in my splash color.
ARCHETYPE BREAKDOWN
As usual, we have ten distinct deck archetypes, corresponding to the ten color pair combinations. But the themes of Final Fantasy are set up in a way which makes certain color pairs feel much more compatible for mixing and matching than others.
Some archetypes rely on a high creature count and an aggressive curve. The archetypes which want those kinds of cards are red-white, green-white, black-red, and (to some degree) green red. Moving between those color combinations is just a matter of changing your ratio of different lands. But if you want to swap into a deck which has synergies around non-creature spells and expensive cards, it’s going to need a completely different mix of playables. And if you’re jumping ship halfway through the draft, you may not have picked enough of those other cards to stick the landing!
The second category of decks are the archetypes which want a high artifact count. This includes those which synergise with noncreature spells or sacrificing, since artifacts in this set tend to support those mechanics too. We’re talking blue-white, black-white, blue-red, and blue-black.
Lastly are the ramp decks: these tend to over-index on cards costing six-plus mana, and other effects that help win the late-game or reach it faster. Those are green-blue, green-black, and green-red.
Of course, these are loose guidelines (if green-red showing up twice didn’t make that obvious). Any three color combination can work well depending on the precise mix of cards which show up for you. But I have found that there’s enough bias towards staying within these broad categories that it’s worth keeping in mind as you draft; it helps me figure out when it’s worth grabbing certain splashable cards or off-color fixing lands.
WU: Artifacts Matter
The easy thing about drafting these colors is that it’s very clear which cards support your strategy (the ones that say “artifact” in the typeline or rules text), and there are lots of them. The not-so-easy thing about drafting UW in Final Fantasy is that your deck can end up looking and feeling very different based on which kinds of artifact cards you actually end up with.
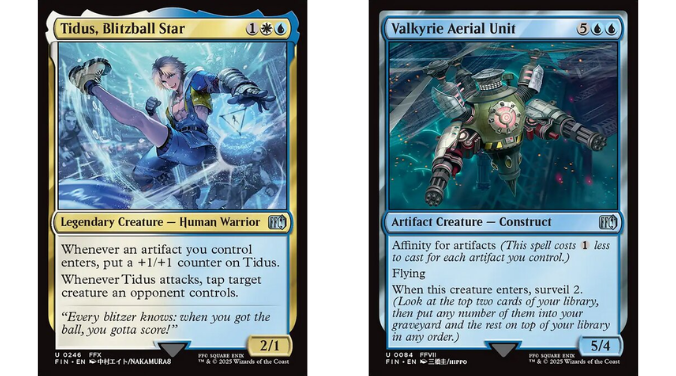
If you are able to get multiple copies of Magitek Infantry and cheap “Job select” equipment cards, you are well positioned to play a very aggressive tempo game. Three drops like Gaelicat and Tidus, Blitzball Star can rack up damage fast while evading or neutralizing blockers, and Slash of Light will be at its most effective. At this point you can invest in cards like Ashe, Princess of Dalmasca, Combat Tutorial and Adventurer’s Airship to help keep your hand fueled, and even more cheap interaction like You’re Not Alone, Ice Magic and Syncopate to force through the win.
But you can also have drafts where you end up with three copies each of White Auracite, PuPu UFO and Fate of the Sun-Cryst, backed up by Cid Highwind and Rook Turret. Despite arguably aiming for the exact same synergy, you are now clearly a much more methodical and reactive deck, and you’ll probably want more landcyclers, draw spells and Swallowed by Leviathan – not to mention splashable bombs from out of color. Being able to tell which kind of UW artifact deck you have brewing and leaning into cards which complement it is the most important skill for success with this archetype.
WB: Sacrifice Grinder
I quite like how the sacrifice-themed archetype has been implemented in Final Fantasy. Not only do you have a lot of good, cheap chaff cards to feed into the sacrifice engines, but many of your payoff cards don’t explicitly require sacrifices at all. This helps white-black feel more like a synergistic midrange deck instead of a clunky combo deck that you might not even be able to draft all the pieces for.
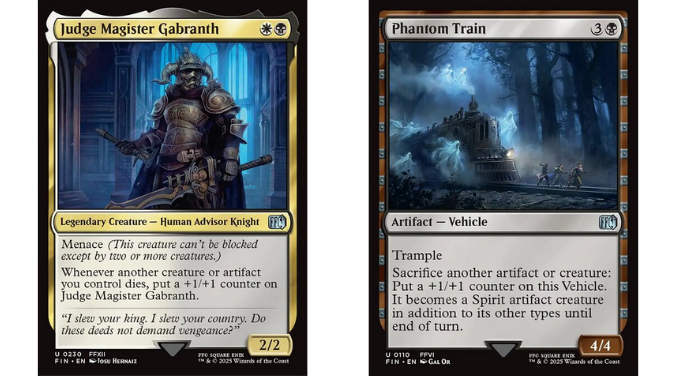
That said, you still definitely need to have a few of the “payoff” type cards to try playing this strategy – I can tell you from experience that just playing a bunch of low-cost white and black cards won’t have the oomph to finish off most opponents. Phantom Train is the gold standard, often running away with games in a few attacks due to the lack of good removal.
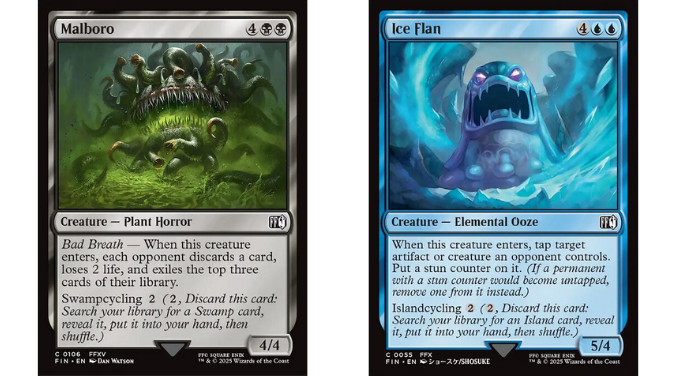
But there’s plenty of other fine options you can build around. The Final Days is great if you can include a bit of black’s self-mill. Delivery Moogle and Gaelicat are a surprisingly effective clock in the air and play well with the cheap artifacts you’re almost certainly running. The main thing is to have as much removal as you can carry, and don’t be too hasty trying to force a win – save the kill spells for big threats or when you know it creates a lethal attack. Be prepared to activate Elixir every game and win by decking with Malboro ETBs. You signed up for this.
UB: Classic Control
You have to laugh a little when even the MTG Arena in-client archetype summary just lists UB as “control”. But even without the fig-leaf of there being some unique mechanical twist to this archetype, it’s still a very fun and interesting deck to actually play. Nothing wrong with some classic card-advantage-centric gameplay, especially in a format where other decks will actually run out of gas if you hold out long enough.
As always, the control gameplan has a few phases. First, you need to survive long enough to be able to cast two spells in one turn cycle. This means having early blockers – PuPu UFO, Demon Wall, Scorpion Sentinel, Sahagin, Magic Pot, or just any two-drops you can find. You also need to make sure you hit your land drops, either with draw effects (Qiqirn Merchant and Adventurer’s Airship provide usable bodies as well as draw smoothing) or cards that directly give you lands or mana (World Map, landcyclers, Blitzball).
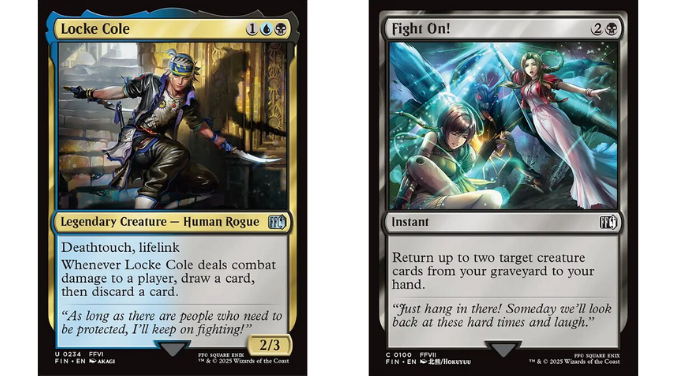
Once you reach the phase of the game where you can afford to do multiple things per turn, you need card draw to ensure you keep having things to do (Circle of Power, Fight On!, Travel the Overworld) or at least cards which can be used multiple times (flashback spells, Ring of the Lucii, Shambling Cie’th, Relentless X-ATM092). Fight On! in particular is more useful than you might think, just because there are more ways for good creatures – such as landcyclers or saga creatures – to end up in your graveyard.
WR: Equipment Aggro
Equipment is a tricky theme to make work in a true aggro deck, because equipment cards by nature are rather slow and mana-intensive ways to buff your creatures. This archetype attempts to get around that by having most of your equipment cards enter play already attached to a 1/1 token, meaning you can play many more of them without losing your aggressive curve, and you don’t need to worry about paying to equip them until after that first bearer dies and you need to stick them on something else.
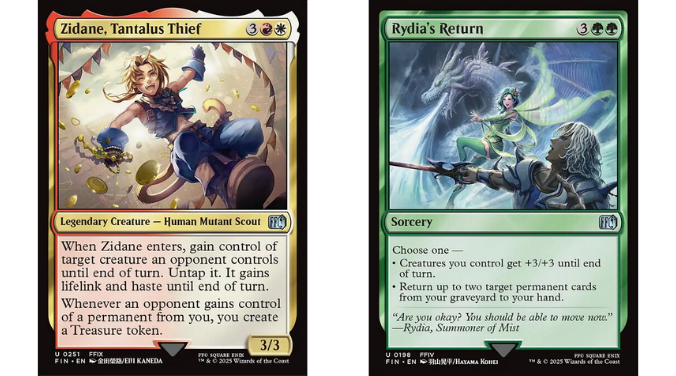
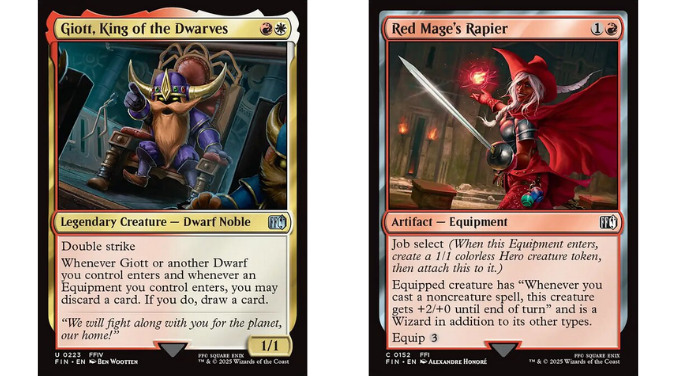
It’s a cool idea, and better executed here than in previous sets, but you are still hurting by playing against the flow of this slower, less aggressive format. I think RW might be the archetype where you’ll feel the biggest drop-off from an excellent draft pool to an average one. If you have multiples of Dragoon’s Lance and Red Mage’s Rapier (by far the most powerful of the equipment cards in terms of pressuring life totals early) and copies of Suplex or Slash of Light to force through those attacks, you can go all-in with finishers like Unexpected Request and Zidane, Tantalus Thief to steal games before the opponent gets going.
But if you can’t find those specific best-in-slot early drops, then you’ll find it hard to reach the point where those blocker-stealing effects become game-ending. In that case, you’ll need to get as much early damage as you can and then look for sneakier ways to finish off the foe. Stacking all your equipment on a flyer like Delivery Moogle is the most common method – but you could also equip everything to one token and fire off Self-Destruct at their face!
UR: Expensive Spells
This archetype, like UW, can end up playing at various speeds depending on which combinations of cards you draft. But despite the emphasis on spells costing four mana or more, I think that the most aggressive versions of UR are the most powerful ones, especially if you’re not splashing in other colors.
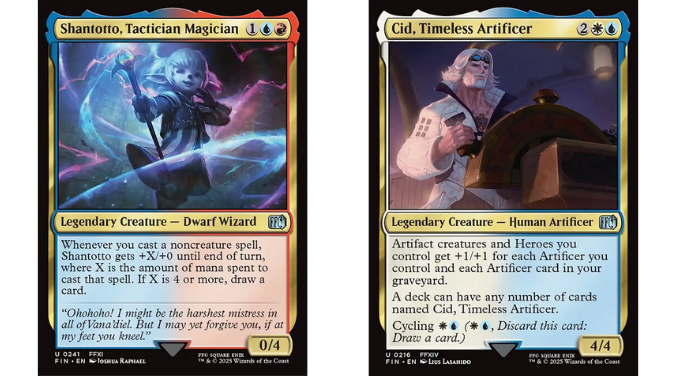
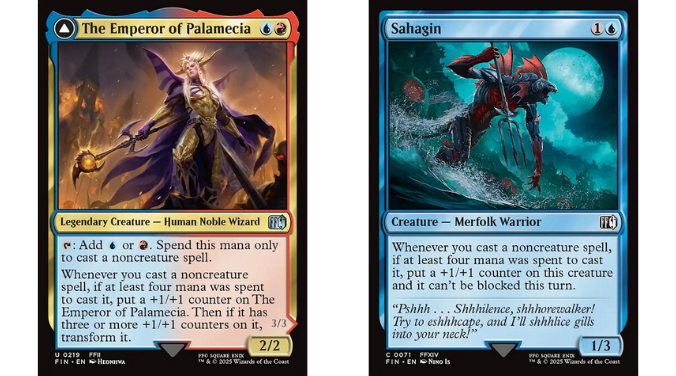
This is partially thanks to how well the cheap creatures available synergise with your big-spell theme, and partially thanks to how the mediocre removal hurts your chances of going long against green ramp players. It just makes a lot more sense to curve out with Blazing Bomb, Sahagin, The Emperor, Ultros and Shantotto, THEN start chaining together copies of Retrieve the Esper, rather than trying to play noncreature spells the whole game. Multiple early Sahagin in particular will just outrace a majority of decks, and it’s not actually difficult to find expensive noncreature spells since the set is built with this theme in mind.
Remember, these cards care about how much mana you actually spent on the spell, not the printed mana value – so the higher tiers of Ice Magic and Thunder Magic, the flashback casts of Dreams of Laguna and Laughing Mad, and a big Syncopate or Choco-Comet will all work to trigger your stuff. Warrior’s Sword, The Prima Vista and token-making spells like Relm’s Sketching also count – but saga creatures like Ramuh and Shiva won’t, and neither will Travel the Overworld if you have more than three towns! I’d recommend taking your time to think about each card as you build your deck so you don’t get tripped up by these technicalities.
BR: Black Mage Aggro
Another red aggro archetype which has to work hard to consistently close games on schedule. However, the red-black deck benefits significantly from its signature effect: “black mage” tokens which ping the opponents whenever you cast a noncreature spell. Considering how many effects create these tokens, and how many noncreature spells you can run in this format where half your “creature” slots are actually equipment, those triggers can end up doing more than half your damage in a lot of games.
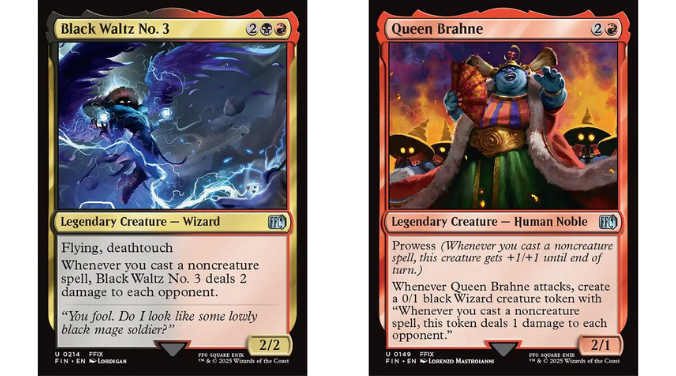
You still want to get in as much combat damage in the early game as you can, even if your opponent will eventually put together too many large blockers for you to clear away. Cards like Queen Brahne, Red Mage’s Rapier and Sidequest: Play Blitzball can generate big rewards if you are able to get through, which makes the keywords from Coral Sword and Item Shopkeep very valuable. Any removal or creature buffs which are cheap enough – special shout-out to Dark Knight’s Greatsword for its “free” equip cost – are equally useful. It should be no surprise that this deck is the best at creating situations where Cornered by Black Mages feels playable!
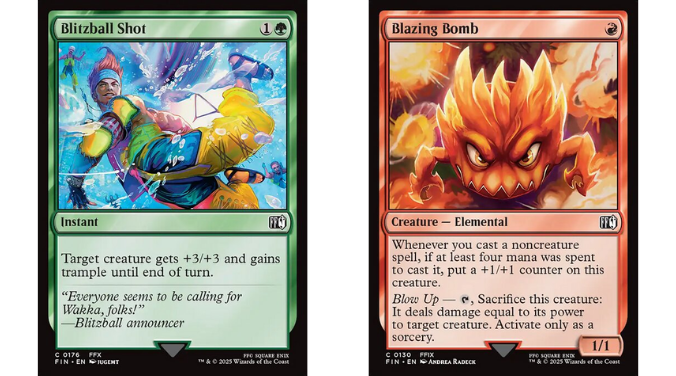
Eventually though, most opponents will start to stabilize. Now you pivot to “defend and burn” mode – just don’t use your wizard tokens to chump block until you have no other choice! I’d recommend keeping one instant removal spell in hand to respond if an opponent gives their creature trample – very few creatures have it naturally in this set, so it’s possible to just chump and wait for the Blitzball Shot or Gladiolus trigger.
WG: Go Wide

White-green doesn’t have an especially obvious or unique theme that stands out like black-red’s wizard tokens, white-red’s equipment or red-green’s chocobos. But the support for a token-aggro strategy is definitely there, and its simplicity means it can be powerful without relying on a precise combination of cards!
We do face that now-recurring issue of our strongest cards wanting to play at different speeds. Punchy early drops like Cactuar, chocobo tokens, Loporrit Scout and Snow Villiers can only dominate until the true bombs start to hit the board. These colors also have excellent cheap tricks in Tifa’s Limit Break, You’re Not Alone, Blitzball Shot and Galuf’s Final Act, which work best when you’re trying to dump your hand faster than the other player and end games early.
On the other hand, the best cards which explicitly support the “go wide” aspect of the deck are significantly more expensive. I would try and judge as you draft whether you’re getting more powerful two-drops, or more copies of Aerith Rescue Mission, Rydia’s Return and The Crystal’s Chosen.
If your power is all in these expensive finishers, then you need to treat your creature count like a resource and preserve as large a board as possible while ramping to these payoffs. If it’s not, then you play more like a normal aggro deck, trading bodies for damage. The best white-green players can tailor their play around this dynamic not just from draft to draft, but from game to game and draw to draw.
UG: Towns Ramp
For the second Draft set in a row, the Temur colors (blue, red and green) are excellently positioned as a greedy, splash-happy archetype that typically ends up playing three or more colors regardless of which pair you prioritize. The blue-green specific part of the triad is the most ramp-centric; you’re not trying to do anything fancy beyond accelerate your mana to cast huge threats.
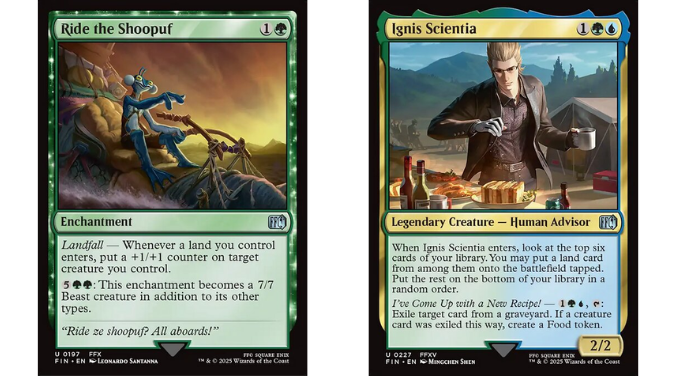
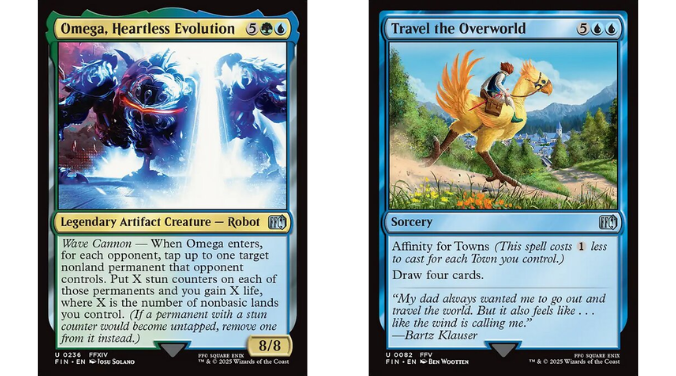
Fortunately for ramp fans, Final Fantasy is way oversupplied on both huge creatures and the acceleration to help cast them. From PuPu UFO, Goobbue Gardener and Torgal, A Fine Hound through to Ignis Scientia, Prishe’s Wanderings, Summon: Fenrir and Blitzball, I can’t remember another format with so many ways to ramp at two and three mana! When you add in land-searching options like Town Greeter and the landcyclers, as well as four-mana ramp spells like Reach the Horizon, getting the mana together to cast Omega, Diamond Weapon or Coliseum Behemoth is a question of “when”, not “if”.
I think the most busted thing about playing this deck is how often you can simply ignore the early game and chain ramp spells together on curve – very few opponents will be able to apply enough pressure before you hit that six-plus mana threshold and start chaining bombs. In fact, I’d say you’re more likely to lose from a lack of ramp than an excess – try and over-index on big threats or at least play enough draw spells to find the ones you have so you can slam the door shut decisively once they’re online.
BG: Self-Mill Midrange
Like blue-black control, black-green “graveyard matters” is a style of deck most players will be very familiar with already. But if the general approach here isn’t anything to write home about, the power of the tools included absolutely is! This deck has consistency, redundancy, and raw power to put it at or near the top of any hard-nosed drafter’s tier list.
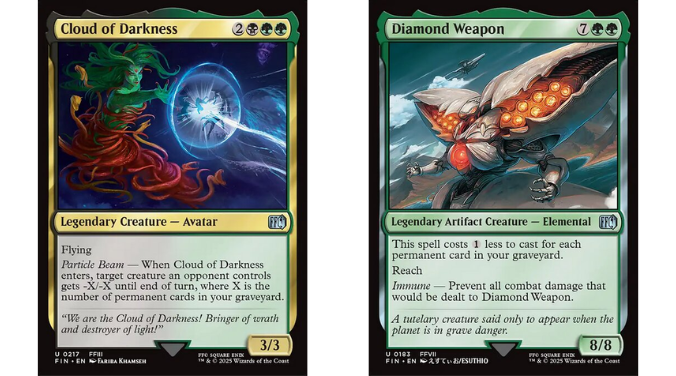
The slow, grindy tendencies of the format and green’s superior ability to splash in the strongest bombs and removal you’re able to draft only solidifies those strengths. You don’t even necessarily need to have self-mill cards like Town Greeter, Shinra Reinforcements or Vanille, Cheerful l’Cie (though those should absolutely be prioritized). Just playing defensively and looking to trade cards with your opponent will naturally fill your yard and charge up payoffs like Exdeath, Cloud of Darkness and The Final Days. Landcyclers are even better here than usual, synergizing both with those effects and Evil Reawakened.
Meanwhile you’re also spoiled with arguably the format’s best card advantage in Rydia’s Return, Fang, Fearless l’Cie, and Fight On!. When it comes to the lategame, being able to recur Coliseum Behemoth, Summon: Anima and the disgusting Diamond Weapon should help you roll over even other green decks with relative ease.
RG: Landfall Midrange
I think green is pretty decisively the best color in Final Fantasy draft, and all the green archetypes are near the top of the power scale – in part because of how flexibly they can blend into each other with their shared card pool and great fixing. But if I had to single out just one deck as the most consistently good performer, it has to be red-green! Great early, middle and late, with excellent bodies and interaction, and no need to rely on specific synergies or payoff cards to reach its full potential – the chocobos are here to dominate.
Where other decks have to choose between a more early-game or late-game centric build, red-green can effortlessly bridge the gap with ramp spells and landfall synergies. Torgal, A Fine Hound on two curves into Town Crier plus Rydia, or a splashed Ignis Scientia, or Vanille… or just selling out for Reach the Horizon to untap with six mana on turn four! Or you could try Sazh’s Chocobo into Sidequest: Raise a Chocobo, play Prishe’s Wanderings or Summon: Fenrir as a reasonable turn three combat enhancer, and then drop turn four Summon: Fat Chocobo and flip your Sidequest for an almost unbeatable board lead.
Those combinations might sound cherry-picked, but there’s so much depth to the pool of ramp and landfall synergies that you’ll keep tripping over others as you draft. Rydia reanimating Fenrir after it expires on turn five is filthy. Sandworm adding five hasty power plus a bonus round of landfall triggers is overwhelming. Adding a bunch of +1/+1 counters to already above-rate attackers with Ride the Shoopuf, only to convert it into a 7/7 as a free curve topper once you’ve dumped your hand, feels like an insult. And in a format where instant removal is at its worst, you have the power to simply end games on the spot with the four mana combo of Blitzball Shot into post-combat Self-Destruct!
Perhaps it’s fitting that “gross” is also a synonym for “massive”.
GET OUT THERE AND SUPLEX THAT TRAIN
Right, I’ve told you all I possibly can about finding success in the playground of legends that is Final Fantasy Draft. It’s funny how much the summary of this set might sound like my take on Tarkir: Dragonstorm, but somehow the feeling in gameplay is completely different.
I really appreciate that we can have a set where you’re not doomed without a turn-two removal spell, but that also doesn’t make small creature decks feel totally lost and irrelevant. If I did have to pick a recent set to compare it to, I’d probably say Lost Caverns of Ixalan, with the tendency for aggro decks to pivot towards indirect damage in the lategame, and the powerful lategame in various colors and flavors.
If you’re a fan of that set, and older sets like Dominaria – or just of Final Fantasy as a franchise – then this format will be a delight!
As special thanks for sticking around to the end, here are my top-rated commons to look for in each color for those early-pack-one picks when you’re trying to figure out direction:
WHITE: Fate of the Sun-Cryst, Gaelicat, White Auracite, Aerith Rescue Mission, Weapons Vendor
BLUE: Stuck in Summoner’s Sanctum, Retrieve the Esper, Ice Flan, Combat Tutorial, Sahagin
BLACK: Vayne’s Treachery, Black Mage’s Rod, Sephiroth’s Intervention, Fight On!, Ahriman
RED: Red Mage’s Rapier, Thunder Magic, Hill Gigas, Suplex, Summon: G.F. Ifrit
GREEN: Summon: Fat Chocobo, Chocobo Kick, Town Greeter, Balamb T-Rexaur, Goobbue Gardener
OTHER: Adventurer’s Airship, World Map, Crossroads Village, any two-color Town

Tom’s fate was sealed in 7th grade when his friend lent him a pile of commons to play Magic. He quickly picked up Boros and Orzhov decks in Ravnica block and has remained a staunch white magician ever since. A fan of all Constructed formats, he enjoys studying the history of the tournament meta. He specializes in midrange decks, especially Death & Taxes and Martyr Proc. One day, he swears he will win an MCQ with Evershrike. Ask him how at @AWanderingBard, or watch him stream Magic at twitch.tv/TheWanderingBard.